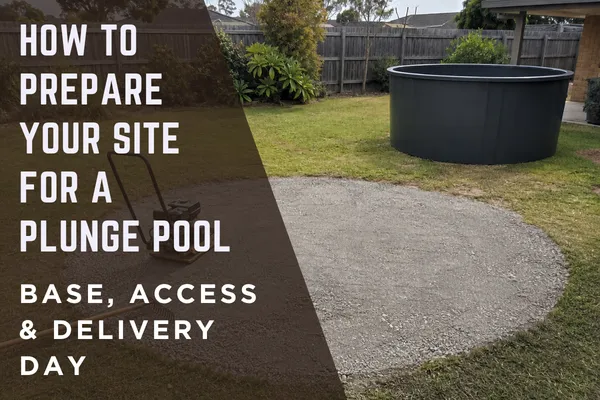
How To Prepare Your Site For A Plunge Pool: Base, Access & Delivery Day
You've picked your size. You've picked your colour. Now comes the part nobody mentions in the sales brochure: getting the thing into your backyard and set up properly. This is where most people either sail through in a single weekend, or end up with an unexpected $900 crane bill because nobody measured the side gate first — or a base that needs redoing because it wasn't built to spec.
The good news is that plunge pool site prep isn't complicated. It just needs to happen in the right order, with the right information — including your engineer's drawings — before delivery day arrives.
The short answer: preparing your site for an Aussie Plunge Pool™ comes down to four things — a level, compacted base built to your engineer's drawings (usually 100–150mm of crusher dust, correctly tapered), enough clearance to get the shell from the street to its final position, a rough plan for delivery day, and — if you're on a slope or building a deck — a couple of extra checks most people miss. Get those sorted before your delivery window and installation becomes a DIY job, not a construction project.
What Do You Actually Need To Prepare Before Delivery Day?
Because Aussie Plunge Pools are lightweight, one-piece rotomoulded shells, site prep looks nothing like prepping for a traditional concrete or fibreglass pool. There's no excavation crew, no weeks of trades traffic, and no concrete trucks blocking the street.
What you do need is a flat, engineered base for the shell to sit on, a path wide enough to get it there, power and water sorted, and — for anyone on a sloped block or planning a deck — a slightly different approach to the base itself. Most backyards can handle all of it with a weekend of prep, your engineer's drawings on hand, and a couple of mates.
What's The Best Base For An Above-Ground Plunge Pool?
For most installations, a compacted crusher dust pad is the standard and most cost-effective base. Build it up from the ground: natural ground prepared and trimmed to a gentle fall away from the pad, then a compacted pad — typically 100–150mm of crusher dust or road base, compacted in layers with a plate compactor. A geotextile fabric or 5–10mm rubber underlay between the pad and the shell adds extra protection against fine grit, and it's worth including even though it's optional.
Size the pad to the pool's diameter plus roughly 300mm all around. As a working example, a 7,000L round shell at around 2.9m diameter needs a pad closer to 3.5m across. Skipping the compaction step is the most common mistake — loose gravel, un-compacted fill, or soft garden soil will settle over time and can twist the shell out of shape.
If you're on expansive clay or particularly soft ground, increase the pad thickness to around 150mm, add a geotextile layer beneath the pad, and compact it in two passes rather than one. On sandy sites, a light moisture mist before compacting improves density. A treated pine, concrete header, or masonry edge restraint is optional but keeps the pad tidy and resists erosion long-term.
Working From Your Engineer's Drawings
This is the step the DIY version of the internet tends to skip, and it's the one that actually matters most. Your Aussie Plunge Pool™ comes with engineer's drawings that specify the exact pad build-up and, critically, the correct taper for your base — the base isn't simply flat, it's built to a specific fall and profile that the drawings set out. Building from memory or a rough guess instead of the drawings is how pads end up needing to be redone.
Have a digital or printed copy of the drawings on hand before you start digging, and check your pad against them at each stage rather than only at the end. If anything about your site doesn't seem to match what the drawings assume — an odd slope, soft patches, drainage that won't cooperate — it's far cheaper to sort that out on paper than after the crusher dust is down.
What If Your Yard Is Sloped?
A sloped block needs a different approach to the base, not just a thicker one. Bench or terrace the area first, cutting the slope into level steps rather than building a pad that's thick at one edge and thin at the other. A pad without proper retaining that simply follows the slope is unstable and won't hold its level over time.
If terracing means retaining a cut or fill edge, that retaining structure needs to be sorted as its own step — engineered appropriately for the height and load involved — before the pool pad itself goes down. It's an extra stage, but it's far easier to manage before delivery day than to retrofit around an installed shell.
What If I Want A Concrete Slab Or In-Ground Install?
A reinforced concrete slab is the premium option for anyone planning to build a deck flush against the shell — typically a 100mm reinforced slab with N12 mesh on a compacted sub-base, built to your engineer's drawings and tapered as specified, with a smooth trowel finish and control joints kept outside the pool footprint. It gives the most stable, dead-flat platform available. Make sure slab edges don't create a trip hazard or a water trap, and that the fall still runs away from the pool zone.
For semi-inground or fully in-ground installs, the approach flips: excavate to the manufacturer's footprint plus working clearance, lay a compacted bedding layer to your engineer's drawings (again, around 100–150mm), set the shell on the level base, then fill the shell with water as you backfill around it in shallow, compacted lifts. Filling and backfilling together keeps the wall supported and prevents distortion — never backfill against an empty or near-empty shell, and avoid angular rock directly against the wall. If groundwater is a possibility on your block, talk to your installer about a hydrostatic relief solution before you start digging.
Building A Deck Around Your Pool
If a deck is part of the plan, the pool base and the deck need to stay structurally independent of each other. Use a ring beam and footings designed so the deck's load never transfers onto the pool shell or its base — the pool base should be able to do its job without carrying any weight from the deck above it.
A couple of finishing details matter here too: keep any soft landscaping slightly below coping level, and maintain a clear drip edge around the pool so runoff has somewhere to go rather than pooling against the shell.
How Much Access Space Does Your Backyard Need?
This is the step most people underestimate, and it's the one that turns a simple Sunday project into a costly one if it's skipped. Before delivery day, measure your narrowest side path width, your gate opening (width and height), and check for any overhead obstructions like eaves or power lines along the route.
If there's a clear side path, the shell can usually be rolled in on a trolley with two or three people — quiet, quick, and no machinery involved. Tight access is a different story. Where a side path or gate is too narrow, a quick hi-ab or crane lift over the house is the usual fix, and it only takes about an hour when it's planned properly.
The key word is planned. Confirming your access measurements with your installer ahead of time means the right method is booked from the start, rather than discovered on the day — which is exactly how unplanned crane fees happen.
What Happens On Delivery Day?
Delivery day runs to a straightforward sequence, and knowing it in advance takes the guesswork out of the process:
Three days before: confirm the base is level, clear the access path, and make sure any new outdoor power point is installed.
The day before: confirm your delivery window, and give neighbours a heads-up if a crane or hi-ab lift is needed.
Morning of delivery: walk the driver through access, the pad, and final positioning.
Midday: the shell is rolled or lifted into place and levelled.
Afternoon: filling begins from the mains or a water cart.
Evening: the start-up kit goes in and the filter runs its first cycle.
The next morning: a quick skim, a water test, the ladder goes on, and the pool is ready.
Most installs go from empty backyard to ready-to-use pool inside a single weekend — no trades traffic, no months of waiting.
Do You Need Council Approval?
In most Australian states and territories, any pool deeper than 300mm needs a compliant safety barrier, registration, and inspection. Aussie Plunge Pools provides engineering documentation and general guidance to help with this, but requirements vary by council, so it's worth checking your specific state resource before you start — NSW, Queensland, Victoria, South Australia, Western Australia, the ACT, Tasmania and the Northern Territory all publish their own pool and spa safety pages.
A self-closing gate with a compliant latch, non-slip access, and a clear CPR sign near the pool area are standard requirements almost everywhere. Sorting these alongside your base and access prep means there's nothing left to organise once the pool is filled.
Tools You'll Want On Hand
A short list covers most installs:
Reference: your engineer's drawings, digital or printed, on hand throughout base prep
Moving: a trolley or dolly, plus lifting straps
Base prep: a shovel, rake, and a long straightedge or spirit level
Plumbing: PVC primer and glue, fittings, hose, and a tap splitter
Power: an outdoor power point installed by a licensed electrician
Safety: gloves and eye or ear protection
None of this requires trade-level skill. It's the same kind of prep most Australians would tackle for a garden project on a long weekend.
Two Checklists To Run Before Delivery
Base Day Checklist
Engineer's drawings ready to consult (digital or printed)
Pad diameter = pool diameter + 300mm
Compacted in layers; surface within ±5mm level
Drainage falls away from the pad; no ponding spots
Separator layer (geo-fabric or rubber underlay) placed
Edge restraint installed, if you're using one
Red-Flag Fix Before Delivery
Soft, springy, or freshly placed fill → re-compact, or replace with road base
Visible ponding after hosing the pad → regrade so the fall runs away from the pad
More than 5mm level variance across the pad → re-screed, re-compact, and re-check
Frequently Asked Questions: Plunge Pool Site Preparation
How much space do I need to prepare for a plunge pool?
Allow the pool's diameter plus around 300mm all around for the base pad itself, and separately check your narrowest access point — side path width and gate opening — against the shell's dimensions before delivery. For most Aussie Plunge Pool™ sizes, a standard side gate and path are enough for a trolley roll-in.
What's the cheapest base option for a plunge pool?
A compacted crusher dust pad is the most cost-effective option and is suitable for most above-ground installs. It's typically 100–150mm deep, built and tapered to your engineer's drawings, and levelled within about 5mm, with the surrounding ground falling gently away for drainage.
Do I need engineer's drawings to prepare my base?
Yes. Your Aussie Plunge Pool™ comes with engineer's drawings that set out the correct pad build-up and taper for your specific base. Building from a general guide instead of your drawings is the most common reason a pad needs to be redone — have them on hand, digital or printed, before you start.
Can I install a plunge pool on a sloped block?
Yes, but a slope needs benching or terracing first rather than a pad that's simply thick on one side. Any retaining required for the terracing should be sorted as its own properly engineered step before the pool pad goes down.
Do I need a crane to install a plunge pool?
Not always. Where there's clear side access, the shell can usually be rolled into position by hand with a couple of helpers. A hi-ab or crane lift is only needed for tight-access blocks, and it's a quick job — around an hour — when it's booked in advance rather than discovered on delivery day.
How long does plunge pool site prep take?
Base prep can usually be completed over a weekend, and combined with a planned delivery, most Aussie Plunge Pools go from empty backyard to full and ready to use within a matter of days, not weeks.
Can I install a plunge pool myself?
Yes — Aussie Plunge Pools are designed to be DIY-friendly, with an illustrated install guide, engineer's drawings, and council-friendly documentation included. Most owners handle base prep, positioning, and plumbing themselves, calling in a licensed electrician only for the outdoor power point.
The information above reflects best practice for small round poly plunge pools. Always cross-check your specific pad thickness and any local variations against the official installation guide and engineer's drawings provided with your Aussie Plunge Pool™, and confirm council requirements for surrounds, drainage and barriers with your local authority. If you're ever unsure, send site photos and measurements through to our support team at [email protected]— we're happy to sanity-check your plan before delivery.
Ready to see sizes and pricing? Call Aussie Plunge Pools today on 02) 6628 7948.
